As a website owner, one of the most important aspects of your website is navigation. A well-organized navigation system can help visitors find the information they need quickly and efficiently. In WordPress, you can create custom menus to control the navigation of your website. In this article, we will show you how to create custom menus in WordPress.
Create a Custom Menu in WordPress: A Step-by-Step Guide
Step 1: Understanding WordPress Menu System
Before we get started, let’s take a quick look at how WordPress menus work. WordPress menus are made up of two main components: menu items and menu locations.
Menu items are the individual links that appear in your menu. You can add menu items for pages, posts, categories, tags, custom links, and more. Each menu item can also have a label or a title, which is what the visitor will see on the front end.
Menu locations are the areas on your website where menus can be placed. Depending on your WordPress theme, you may have multiple menu locations available, such as the primary menu, footer menu, or social media menu.
Step 2: Creating a New Menu in WordPress

To create a custom menu in WordPress, first, log in to your WordPress dashboard. Then, navigate to Appearance > Menus.
On the Menus screen, you can either create a new menu or edit an existing one. To create a new menu, click the “Create a new menu” link at the top of the screen.
Step 3: Adding Menu Items to Your Menu
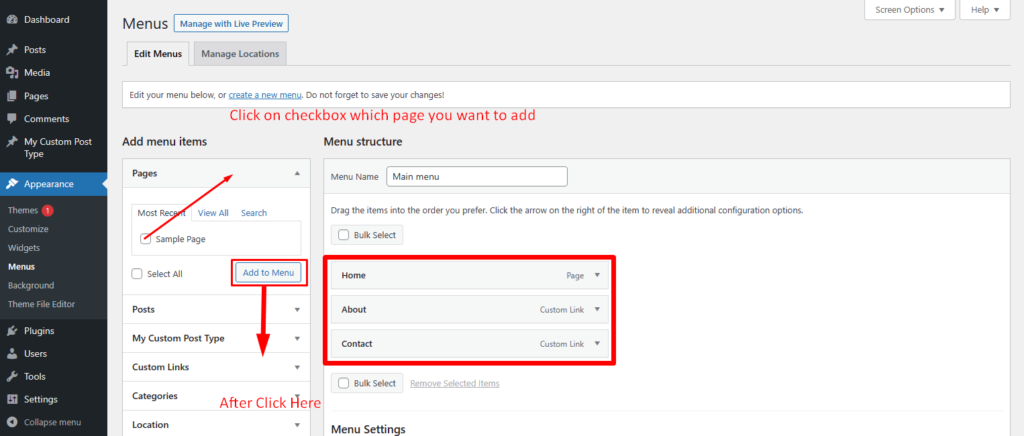
Once you have created your new menu, it’s time to add some menu items. You can add a variety of menu items, including pages, posts, categories, tags, and custom links.
To add a menu item, simply select the type of item you want to add from the left-hand column, and then click the “Add to Menu” button.
Once you have added your menu items, you can drag and drop them into the order you want them to appear in the menu.
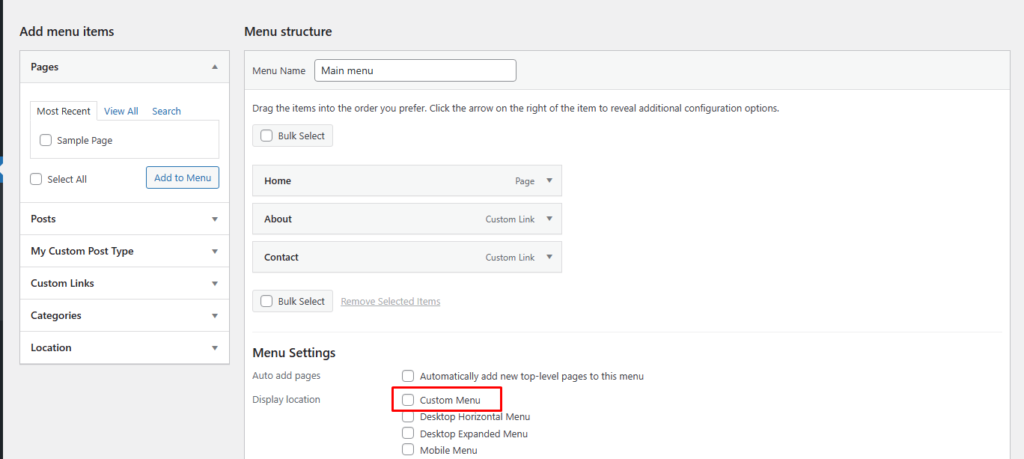
Step 4: Assigning Your Menu to a Menu Location
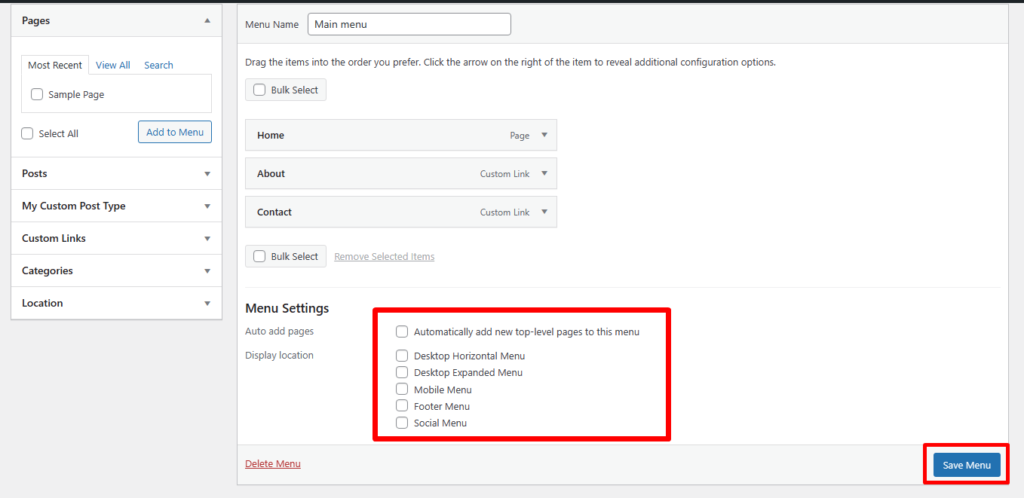
The final step in creating a custom menu in WordPress is to assign your menu to a menu location. Depending on your theme, you may have multiple menu locations available.
To assign your menu to a location, scroll down to the “Menu Settings” section at the bottom of the screen. Select the menu location where you want your menu to appear, and then click the “Save Menu” button.
Congratulations! You have successfully created a custom menu in WordPress.
How to create a custom menu in WordPress using custom code?
If you want to create a custom menu in WordPress using custom code, you can do so by adding some code snippets to your theme’s functions.php file. Here’s how:
Step 1: Register a New Menu Location
The first step is to register a new menu location in your theme. This will create a new area where you can place your custom menu.
To do this, add the following code to your theme’s functions.php file:
function custom_menu_setup() {
  register_nav_menus( array(
    'custom-menu' => __( 'Custom Menu' ),
  ) );
}
add_action( 'after_setup_theme', 'custom_menu_setup' );
This code will register a new menu location called “Custom Menu.”
Step 2: Create a Custom Menu
The next step is to create a custom menu in WordPress. You can do this by adding the following code to your theme’s functions.php file:
function custom_menu() {
wp_nav_menu( array(
'theme_location' => 'custom-menu',
'menu' => 'Custom Menu',
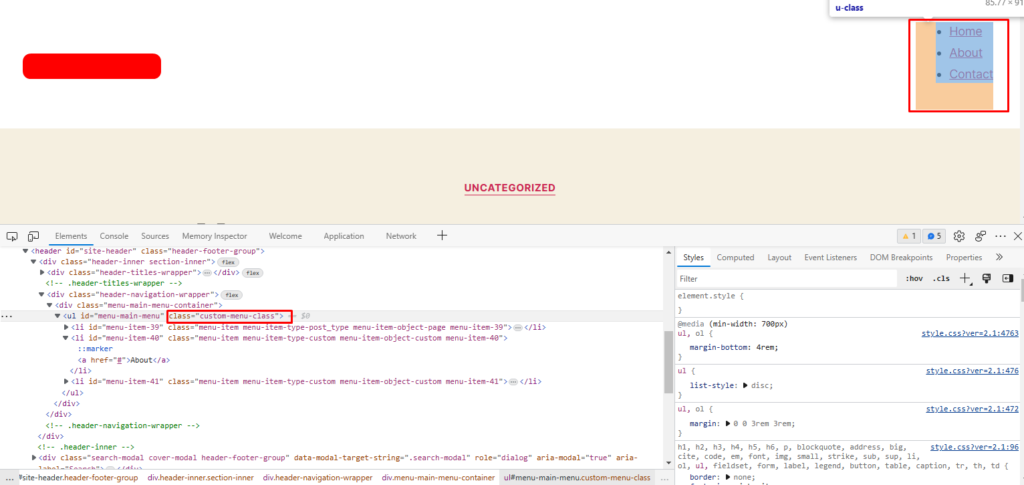
'menu_class' => 'custom-menu-class'
) );
}This code will create a custom menu and assign it to the “Custom Menu” location. You can also specify a custom CSS class for your menu by changing the value of the ‘menu_class’ parameter.
Step 3: Display the Custom Menu
The final step is to display your custom menu in your theme. You can do this by adding the following code to your theme’s header.php file:
<?php
  if ( has_nav_menu( 'custom-menu' ) ) {
    custom_menu();
  }
?>
This code will check if a custom menu exists in the “Custom Menu” location and display it if it does.
Step 4: Customizing Your Custom Menu
Once you have created your custom menu, you can customize it further by adding CSS to your theme’s style.css file. You can target your custom menu using the custom CSS class you specified in the ‘menu_class’ parameter.
For example, if you set your custom CSS class to ‘custom-menu-class’, you can add the following CSS to your style.css file to change the background color of your custom menu:
.custom-menu-class {
  background-color: red;
}
Tips for Creating Effective WordPress Menus
Now that you know how to create custom menus in WordPress, here are a few tips to help you create effective menus that will improve your website’s navigation:
- Keep your menus simple: Avoid cluttering your menu with too many items. Stick to the most important pages and categories.
- Use descriptive labels: Make sure your menu labels accurately describe the content they link to.
- Use sub-menus: If you have a lot of pages or categories, use sub-menus to organize them and make them easier to navigate.
- Update your menus regularly: As your website evolves, make sure to update your menus to reflect any changes in your content.
Conclusion
In conclusion, creating a custom menu in WordPress using custom code is a simple process that involves registering a new menu location, creating a custom menu, and displaying it in your theme. By following the steps outlined in this article, you can easily create a custom menu that fits your website’s needs.
Related Articles
How to create custom taxonomy in WordPress?
If you’re a WordPress user, you’re probably familiar with the concept of taxonomies. Taxonomies are used to organize and categorize content on a WordPress site, and they can be especially useful for sites with a large amount of content.
How to Send Email Notification When User Role Changes?
If you are managing a WordPress website with multiple users, there may be times when you need to update a user’s role. For example, you may need to promote a user to an SEO editor or demote a user to a subscriber.