Hello Friends, in this article I will teach you How to create currency converter in JavaScript and also i have listed best currency converter examples which are available on CodePen.
What is Currency Converter?
A currency converter is a software, that is designed to convert a currency into another to check its corresponding value. They do so by connecting to a database of current currency exchange value.
Currency Converter in JavaScript Step By Step Guide
To make a currency converter using JavaScript we have to use frankfurter API this is an open-source, simple, and lightweight API for current and historical foreign exchange (forex) rates published by the European Central Bank.
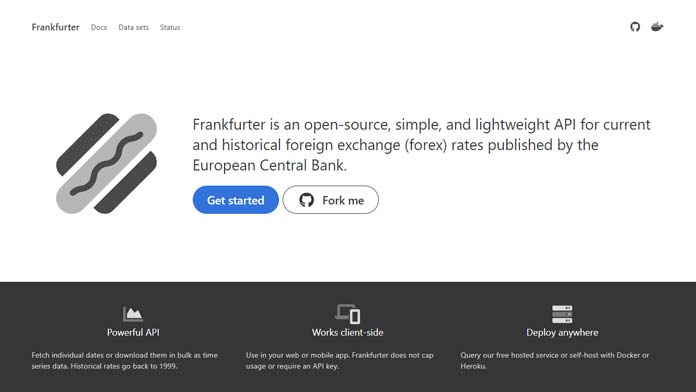
Read more about frankfurter API
Step 1 — Creating a New Project
In this step, we need to create a new project folder and files(index.html, style.css and, main.js) for creating a JavaScript Currency Converter. In the next step, you will start creating the structure of the webpage.
Step 2 — Setting Up the basic structure
In this step, we will add the HTML code to create the basic structure of the project.
<!DOCTYPE html>
<html lang="en">

<head>
  <meta charset="UTF-8" />
  <title>How to create currency converter</title>
  <meta name="viewport" content="width=device-width, initial-scale=1.0" />
  <meta http-equiv="X-UA-Compatible" content="ie=edge" />
  <link rel="stylesheet" href="style.css" />
  <link href="https://fonts.googleapis.com/css2?family=IBM+Plex+Sans&display=swap" rel="stylesheet">
  <link rel="stylesheet" href="https://cdnjs.cloudflare.com/ajax/libs/font-awesome/4.7.0/css/font-awesome.min.css">
  <script src="https://ajax.googleapis.com/ajax/libs/jquery/3.5.1/jquery.min.js"></script>
</head>

<body>

   <!-- Add Main.js File -->
   <script src="main.js"></script>
</body>

</html>
This is the base structure of most web pages that use HTML.
Add the following code inside the <body> tag:
<div class="currency-row-outer">
    <div class="currency-converter">
      <h2>Currency Converter</h2>

      <div class="field grid-50-50">
        <div class="colmun col-left">
          <input type="number" class="form-input" id="number" placeholder="00000">
        </div>
        <div class="colmun col-right">
          <div class="select">
            <select name="currency" class="currency" onchange="updatevalue()"></select>
          </div>
        </div>
      </div>

      <div class="field grid-50-50">
        <div class="colmun col-left">
          <input type="text" class="form-input" id="output" placeholder="00000" disabled>
        </div>
        <div class="colmun col-right">
          <div class="select">
            <select name="currency" class="currency" onchange="updatevalue()"></select>
          </div>
        </div>
      </div>

    </div>
  </div>
Step 3 — Adding Styles for the Classes
In this step, we will add styles to the section class Inside style.css file
/*Start Currency Converter*/
* {
    padding: 0;
    margin: 0;
    font-family: 'IBM Plex Sans', sans-serif;
}

body {
    height: 100vh;
    width: 100vw;
    overflow-x: hidden;
}

.currency-row-outer {
    display: flex;
    align-items: center;
    justify-content: center;
    height: 100%;
}

.currency-converter {
    width: 100%;
    max-width: 480px;
    text-align: center;
}

input,
select {
    color: #363636;
    font-size: 1rem;
    height: 2.3em;
    border-radius: 4px;
    max-width: 100%;
    width: calc(100% - 15px);
    margin: auto;
    outline: 0;
    background: #fff;
    border-color: #dbdbdb;
    padding-left: 15px;
    border: 1px solid #00000057;
    box-shadow: inset 0 0.0625em 0.125em rgb(10 10 10 / 5%);
    -webkit-appearance: none;
}

.field.grid-50-50 {
    display: grid;
    grid-template-columns: 1fr 1fr;
    grid-gap: 15px;
}

.currency-converter .colmun {
    margin-bottom: 15px;
}

select.currency {
    border-color: #3273dc;
    width: 100%;
    height: 100%;
    cursor: pointer;
    font-size: 1em;
    max-width: 100%;
    outline: 0;
    display: block;
}

.currency-converter .select {
    position: relative;
    height: 100%;
}

h2 {
    padding-bottom: 30px;
}

.currency-converter .select:after {
    transform: rotate(-45deg);
    transform-origin: center;
    content: "";
    border: 3px solid rgba(0, 0, 0, 0);
    border-radius: 2px;
    border-top: 0;
    border-right: 0;
    display: block;
    height: 0.525em;
    width: 0.525em;
    z-index: 4;
    position: absolute;
    top: 50%;
    right: 1.125em;
    margin-top: -0.4375em;
}

.select:not(:hover)::after {
    border-color: #3273dc;
}

.select:hover::after {
    border-color: #363636;
}
Step 4 — Adding JavaScript code
In this step, we will add some JavaScript code to build Currency Converter in main.js file
const select = document.querySelectorAll('.currency');
const number = document.getElementById("number");
const output = document.getElementById("output");
fetch('https://api.frankfurter.app/currencies').then((data) => data.json())
.then((data) => {
display(data);
});
function display(data) {
const entries = Object.entries(data);
for (var i = 0; i < entries.length; i++) {
select[0].innerHTML += `<option value="${entries[i][0]}">${entries[i][0]} : ${entries[i][1]}</option>`;
select[1].innerHTML += `<option value="${entries[i][0]}">${entries[i][0]} : ${entries[i][1]}</option>`;
}
}
function updatevalue() {
let currency1 = select[0].value;
let currency2 = select[1].value;
let value = number.value;
if (currency1 != currency2) {
convert(currency1, currency2, value);
} else {
alert("Choose Diffrent Currency");
}
}
function convert(currency1, currency2, value) {
const host = "api.frankfurter.app";
fetch(`https://${host}/latest?amount=${value}&from=${currency1}&to=${currency2}`)
.then((val) => val.json())
.then((val) => {
console.log(Object.values(val.rates)[0]);
output.value = Object.values(val.rates)[0];
});
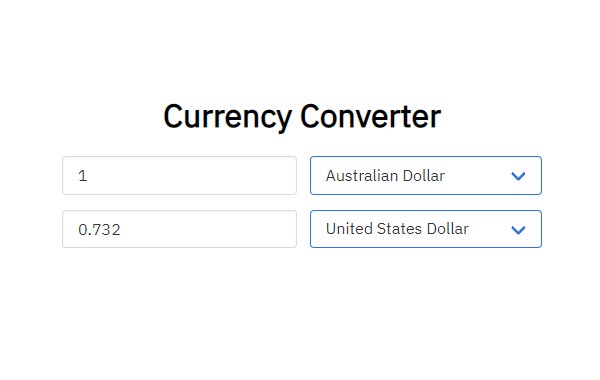
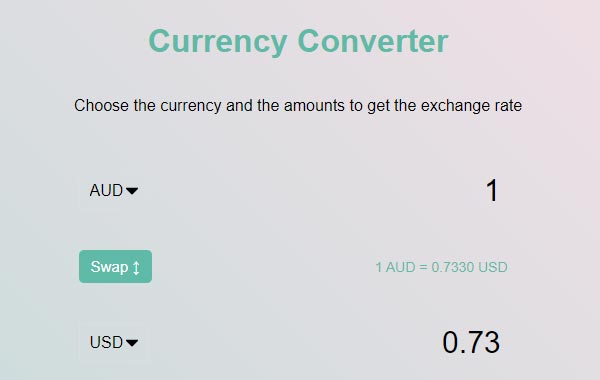
}#Final Result
if you want to change currency name like [ USD ] to [ Australian Dollar ] than you have to replace this ${entries[i][0]} to ${entries[i][1]} this in [ display ] function.
function display(data) {
   const entries = Object.entries(data);
   for (var i = 0; i < entries.length; i++) {
     select[0].innerHTML += `<option value="${entries[i][0]}">${entries[i][1]}</option>`;
     select[1].innerHTML += `<option value="${entries[i][0]}">${entries[i][1]}</option>`;
   }
}
#Result
Best collection of Currency Converter
In this collection, I have listed best Currency Converter examples which are available on CodePen.
#1 Vue js Currency Converter
Currency Converter in Vue.js, which was developed by Jacob Gibellini. Moreover, you can customize it according to your wish and need.
| Author: | Jacob Gibellini |
| Created on: | September 25, 2017 |
| Made with: | HTML, CSS(SCSS) and JS |
| Demo Link: | Source Code / Demo |
| Tags: | Currency Converter in Vue.js |
#2 Currency Converter Widget
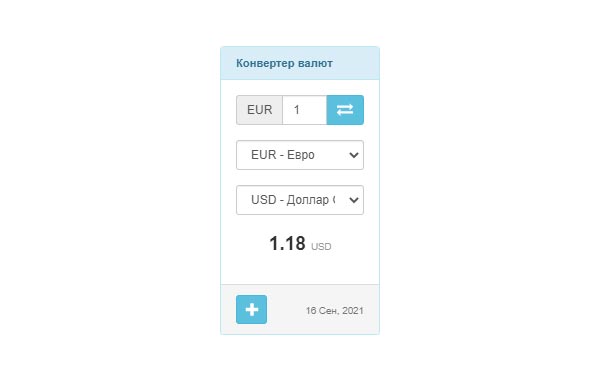
Simple Currency Converter Widget, which was developed by currencyrate. Moreover, you can customize it according to your wish and need.
| Author: | currencyrate |
| Created on: | February 19, 2018 |
| Made with: | HTML, CSS(SCSS) and JS |
| Demo Link: | Source Code / Demo |
| Tags: | Currency Converter Widget |
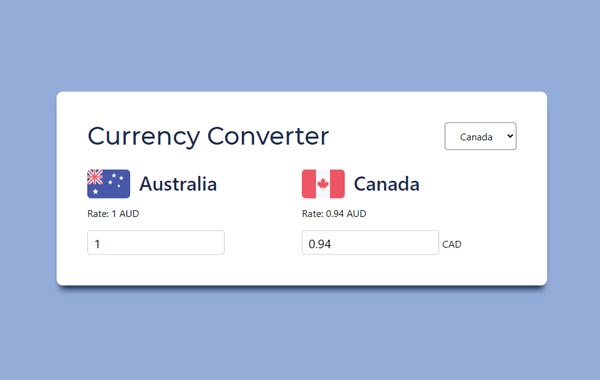
#3 JS Currency Converter
JS Currency Converter, which was developed by Tutul. Moreover, you can customize it according to your wish and need.
| Author: | Tutul |
| Created on: | October 9, 2020 |
| Made with: | HTML, CSS(SCSS) and JS |
| Demo Link: | Source Code / Demo |
| Tags: | JS Currency Converter |
If you liked this article JavaScript Currency Converter, you should check out this one Binary to Decimal Converter.

We also wrote about similar topics like JavaScript Random Quote Generator, Integrate Webcam using JavaScript and many more.