WordPress is a user-friendly content management system widely used for website creation and management. With its numerous customization options, users can tailor their website to their exact requirements. One such feature is Media Library Categories, which enables users to categorize their media files in an organized manner. In this article, we will discuss how to add Media Library Categories in WordPress.
Understanding Media Library Categories in WordPress
Media Library Categories is a WordPress feature that allows users to categorize their media files. It simplifies media file management by sorting them into different categories. By default, WordPress provides two categories: Images and Unattached. However, users can create their own categories and add media files to them.
Steps to Add Media Library Categories in WordPress
Adding Media Library Categories in WordPress is a simple process. Follow the steps below to create Media Library Categories in WordPress:
Step 1: Install and Activate Media Library Categories Plugin
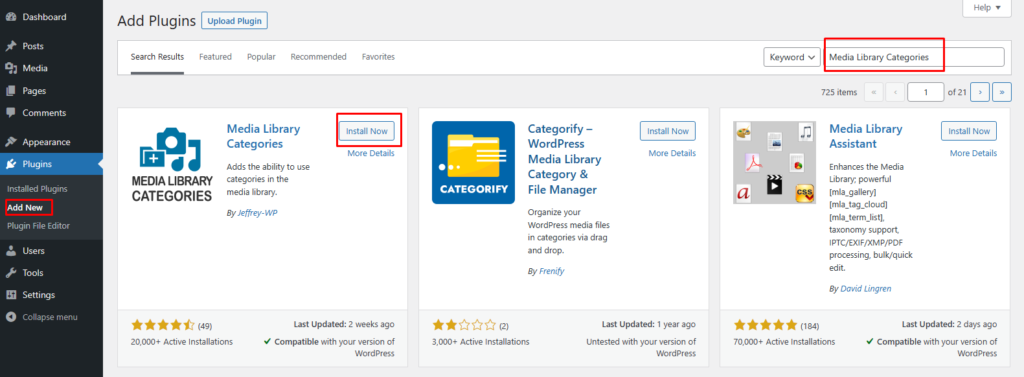
To add Media Library Categories to your WordPress site, you need to install and activate the Media Library Categories plugin. You can easily install it from the WordPress repository or download it from the author’s website. After downloading, simply go to the “Plugins” tab, select “Add New”, then choose “Upload Plugin” and select the downloaded file to install it.
Step 2: Edit Default Media Taxonomy.
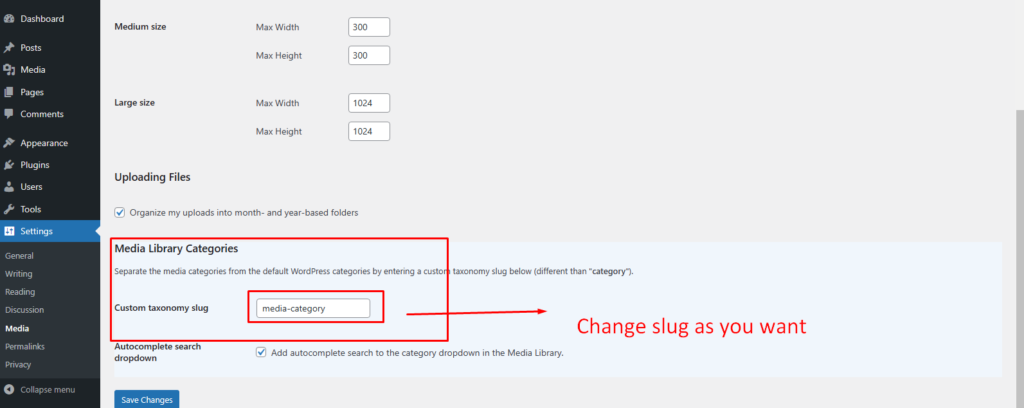
After installing and activating the Media Library Categories plugin, it will automatically add a default category under the Media Library menu. However, if you want to use a different taxonomy for your media files, you will need to edit the plugin settings accordingly.
Step 3: Create Media Categories
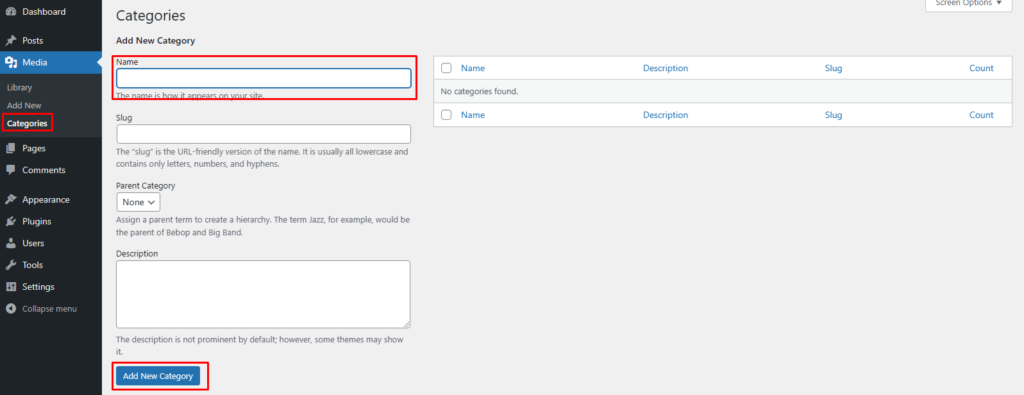
After installing and activating the Media Library Categories plugin, users can create media categories by going to Media > Media Categories. Here, users can add new categories by entering the category name and slug. Users can also select a parent category if they want to create a subcategory.
Step 4: Assign Media Files to Categories
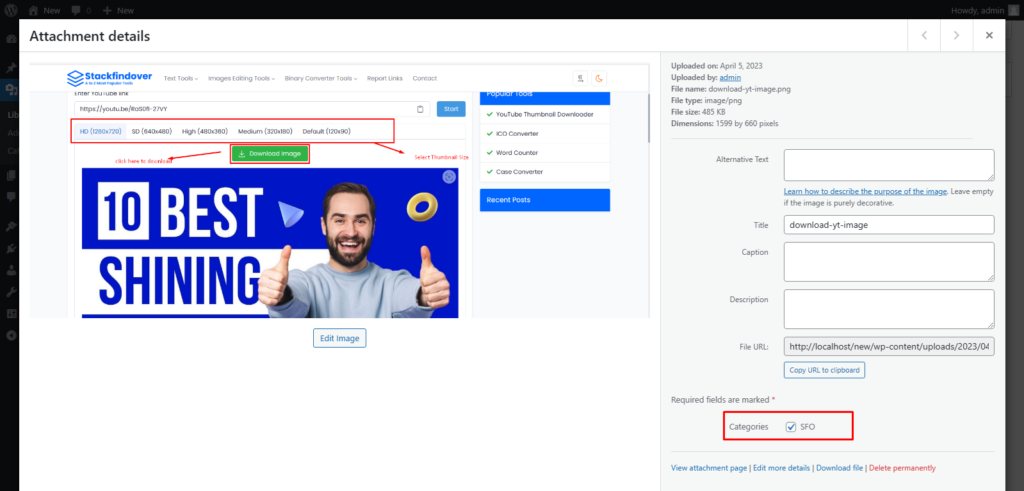
Once the categories are created, users can assign media files to them. To assign a media file to a category, users need to go to Media > Library and select the media file they want to assign. They can then select the category from the dropdown menu under the Attachment Details section and click on Update.
Step 5: View Media Files by Categories
After assigning media files to categories, users can view them by going to Media > Library and selecting the category from the dropdown menu under the Media Library Categories section. This will display all media files assigned to the selected category.
Benefits of Using Media Library Categories in WordPress
Using Media Library Categories in WordPress offers various benefits, including:
Organised Media Files
Media Library Categories in WordPress helps users to organise their media files by categorising them. This makes it easier for users to find media files and reduces the time required to search for them.
Easy Management
Media Library Categories in WordPress makes it easy to manage media files. Users can quickly find media files by selecting the appropriate category, and they can also edit or delete categories as needed.
Better User Experience
Organised media files can provide a better user experience. Visitors to the website can easily find the media files they are looking for, which can help to increase engagement and reduce bounce rates.
How to Add Categories to Media Library in WordPress by using Custom code?
Adding Media Library Categories in WordPress can also be achieved by using custom code. This method is suitable for advanced users who have experience with coding and are comfortable making changes to their WordPress files.
Here are the steps to add media library categories in WordPress using custom code:
- Open the functions.php file of your WordPress theme. This file is located in the wp-content/themes/your-theme-name/ directory.
- Add the following code at the end of the functions.php file:
function wp_add_media_categories() {
    // Add new taxonomy, make it hierarchical (like categories)
    $labels = array(
        'name'              => _x( 'Media Categories', 'taxonomy general name' ),
        'singular_name'     => _x( 'Media Category', 'taxonomy singular name' ),
        'search_items'      => __( 'Search Media Categories' ),
        'all_items'         => __( 'All Media Categories' ),
        'parent_item'       => __( 'Parent Media Category' ),
        'parent_item_colon' => __( 'Parent Media Category:' ),
        'edit_item'         => __( 'Edit Media Category' ),
        'update_item'       => __( 'Update Media Category' ),
        'add_new_item'      => __( 'Add New Media Category' ),
        'new_item_name'     => __( 'New Media Category Name' ),
        'menu_name'         => __( 'Media Categories' ),
    );

    $args = array(
        'hierarchical'      => true,
        'labels'            => $labels,
        'show_ui'           => true,
        'show_admin_column' => true,
        'query_var'         => true,
        'rewrite'           => array( 'slug' => 'media-category' ),
    );

    register_taxonomy( 'media_category', 'attachment', $args );
}

add_action( 'init', 'wp_add_media_categories' );- Save the functions.php file.
- Now, go to the Media Library and select the media file you want to assign to a category.
- In the Attachment Details section, click on the Edit button next to the Categories label.
- Select the category you want to assign the media file to and click on the Update button.
- You can now view your media files by category by going to Media Library and selecting the category from the dropdown menu.
Adding Media Library Categories in WordPress using custom code gives you more control over the categories and their functionality. However, it is recommended that you create a child theme before making any changes to the functions.php file to prevent losing any modifications when you update your theme.
Conclusion
Adding Media Library Categories in WordPress can help users to organise their media files and make it easier to manage them. The process of adding media categories is simple and can be done in just a few steps. Users can also enjoy various benefits, including organised media files, easy management, and a better user experience.
FAQs
Yes, users can create subcategories by selecting a parent category when creating a new category.
Yes, users can edit or delete media categories by going to Media > Media Categories and selecting the category they want to edit or delete.
No, a media file can only be assigned.